Configure ClickOnce Deployment
Information
- ClickOnce is the deployment technology of Microsoft for deploying (allocating) the native applications via the web.
- Advantages:
- The Client can be opened parameterized with the ClickOnce technology via a webfrontend via link.
- Example: From a project list in the intranet, the respective project can be opened directly in PLANTA.
- The ClickOnce client is updated automatically.
- For further information on this, please click here.
- With every delivery, PLANTA provides the ClickOnce client in addition to the classic client.
Requirements
Information
- Windows SDK for Windows 7 and .NET Framework 4 with at least Version 7.0A
- PLANTA project ClickOnce Client
MageUI
Information
- For a successful ClickOnce installation, the application requires two manifests.
- The Application Manifest describes the files that the application requires as well as the security level which is required to run the program.
- The Deployment Manifest indicates the ClickOnce application according to the Application Manifest and defines update rules as well as the minimum required version.
- For working with these manifests, PLANTA uses the MageUI graphic tool (part of the Windows SDK). An example for both manifests is included in the delivery of the ClickOnce client. They must be adjusted for their own environment.
| planta.exe.manifest |
Application Manifest |
| planta.application |
Deployment Manifest |
From C 39.5.24
Note
- In case of updating the files in an already existing ClickOnce Client, you need to first rename the
Application Files directory (containing the planta.exe.manifest and planta.application files) to ApplicationFiles due to an error in MageUI.
Procedure without PLANTA Client Adapter
Application Manifest
Procedure
- Start MageUI.exe
- Select File New Application Manifest or open the already existing planta.exe.manifest manifest via File Open.
- Fill the Name and Version fields accordingly and select x86 as a processor.
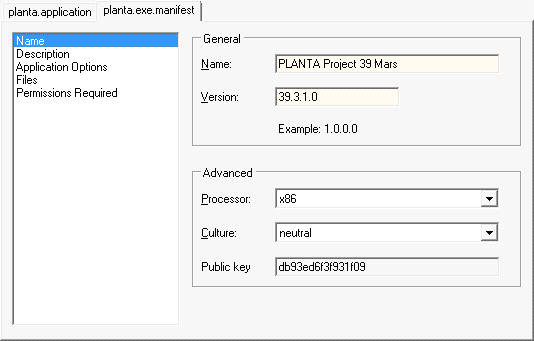
- The Description and Application Options tabs can be skipped.
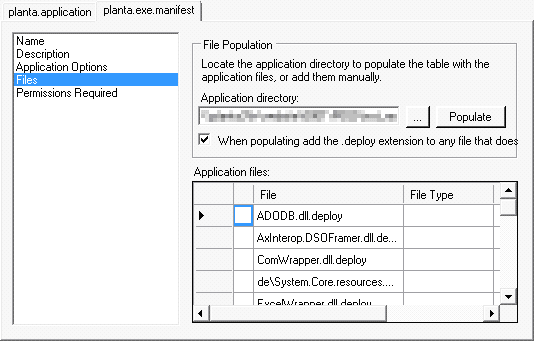
- Afterwards, switch to the Files tab and click on the suspension points (...) and select the directory in which the client is located in the dialog window.
- Activate the When populating add the .deploy extension to any file that does not have it checkbox and click on Populate.
- The files are added to the manifest.
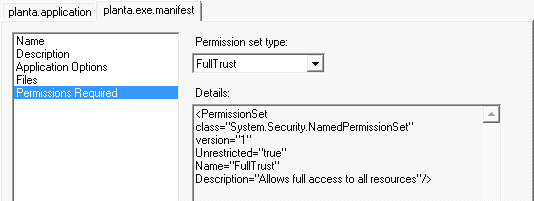
- Select the FullTrust security level in the Permissions Required tab from the listbox.
- Select File Save as and save the file.
- A dialog for signing is opened.
- Select your own certificate and password here. If no certificate is available, a test certificate can be created (with makecert.exe from the Windows SDK as well: instructions can be found online).
Deployment Manifest
Procedure
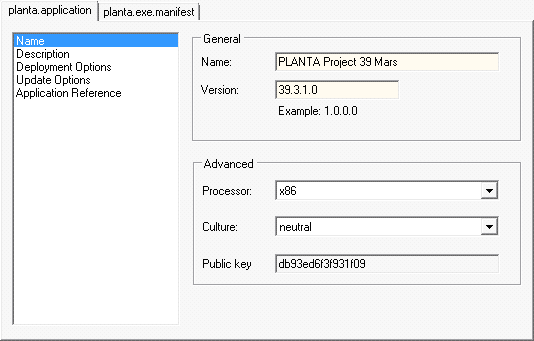
- Select File New Deployment Manifest or open the already existing planta.application manifest via File Open.
- Fill the Name and Version fields accordingly and select x86 as a processor from the listbox.
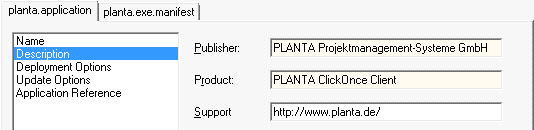
- Fill the Publisher and Product fields in the Description tab.
- Product is the name of the application that is displayed in the Windows Start Menu if the program is installed for offline use.
- If you want to install multiple ClickOnce clients in order to have one client for a productive and another one for a development system, the entries in the Product field of the corresponding client have to differ.
- For example:
- PLANTA project - Development
- PLANTA project - Production
- The corresponding entries can then be found in the list of software installed.
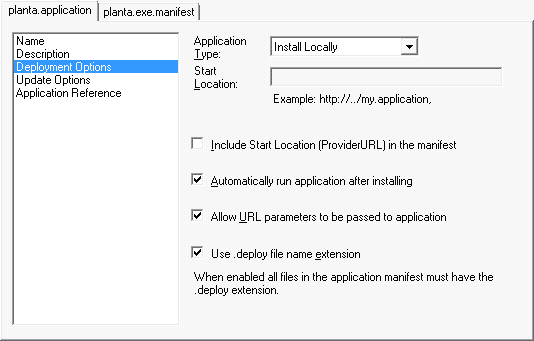
- Switch to the Deployment options tab.
- If you want the client to be invocable online, select Online only from the Application type listbox.
- We do, however, recommend that you select Install locally so that the client does not have to be loaded anew each time it is opened.
- Activate the Use .deploy file name extension and Allow URL parameters to be passed to application checkboxes.
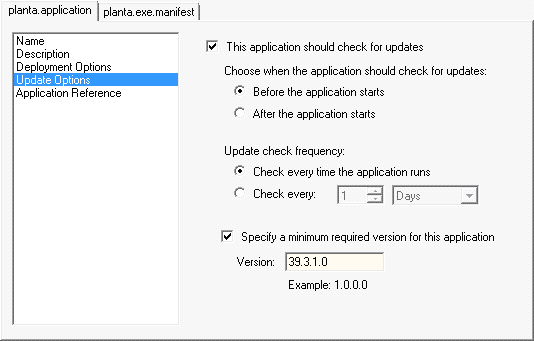
- Select the This application should check for updates as well as the Specify a minimum required version for this application checkboxes in the Update Options tab.
- Enter the current version as Version.
- If an update is due, the process must be carried out again and both manifests must be refreshed.
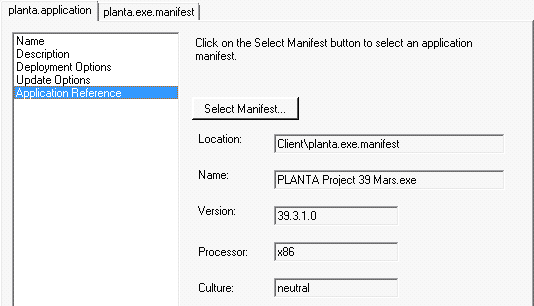
- Select the manifest under Application reference again and complete the new version number of the application manifest at Name.
- Select the Application reference tab and open the dialog window by clicking on Select Manifest.
- Select the application manifest which has been created in the previous step and click on Open.
- Select File Save As and save the file like in the first step.
- Enter the certificate and password In the dialog for signing once again.
Note
- Upon creation of the ClickOnce packet, the Warning MSB3112 message may occur. For further information, click here
 .
.
Configuration
Procedure
- In the client directory, there is a planta.ini.deploy, which defines the server and the port to which the client connects by default.
- If a user installs the client, the ini file is copied in the local directory of the user.
- If you open the URL of the Application Manifest, an optional server parameter in the form of planta.application?server=host:port can be transferred.
- In this case, the local ini file is overwritten by this value.
- If you start the client via the start menu after the installation, it connects to the server defined in the local ini file.
Details
- Further client parameters can be set in the ini file or entered via the URL as follows: [parameter=value]&[parameter=value]...
- When using the ClickOnce client, the client logfiles can be found as follows:
- Open the Windows task manager (CTRL + ALT + Del)
- In the Processes tab, right-click on the planta.exe process and select Open file path.
- The directory which is opened contains the Log folder, in which all client logs are located.
Note
- After data has been changed, both the deployment manifest and the application manifest must be signed anew.
Procedure with PLANTA Client Adapter
Preparation
Information
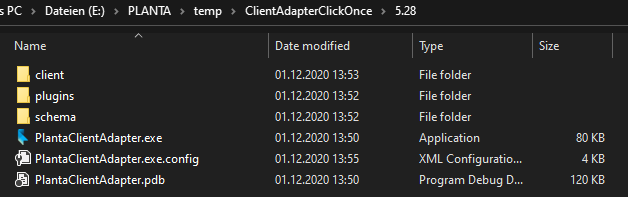
- Create a new directory with the version number. The version number can be selected arbitrarily, however, it is recommended to simply use the version number of the client.
- Copy the PlantaClientAdapter into this directory.
- Create another folder in the same directory and store the PlantaClient in there.
- Configure the client adapter in PlantaClientAdapter.exe.config. The relative path to the client you have just stored must be specified as a client directory.
Note
- If the configuration is changed again at a later point in time, both the deployment manifest and the application manifest must be signed anew.
Example of the directory structure:
Application Manifest
Procedure
- Start MageUI.exe
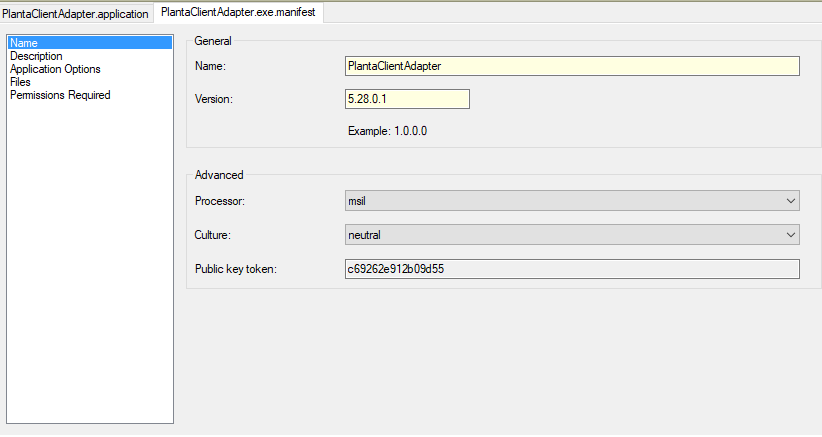
- Select File New Application Manifest.
- Fill the Name and Version fields accordingly and select msil as a processor.
- The Description and Application Options tabs can be skipped.
- Afterwards, switch to the Files tab and click on the ellipses (...) and select the directory (which has been created in the preparatory steps) in which the client is located in the dialog window.
- If you want deployment to be carried out via a web server, activate the When populating add the .deploy extension to any file that does not have it checkbox and click on Populate.
- The files are added to the manifest.
- Set the "optional" checkbox for the WPFVisifire.Charts.dll file.

- Select the FullTrust security level in the Permissions Required tab from the listbox.
- Select File Save as and save the file in the version directory.
- A dialog for signing is opened.
- Select your own certificate and password here.
Deployment Manifest
Procedure
- Select File New Deployment Manifest.
- Fill the Name and Version fields accordingly and select msil from the listbox as a processor.
- Fill the Publisher and Product fields in the Description tab.

- Product is the name of the application that is displayed in the Windows Start Menu if the program is installed for offline use.
- If you want to install multiple ClickOnce clients in order to have one client for a productive and another one for a development system, the entries in the Product field of the corresponding client must differ.
- For example:
- PLANTA project - Development
- PLANTA project - Production
- The corresponding entries can then be found in the list of software installed.
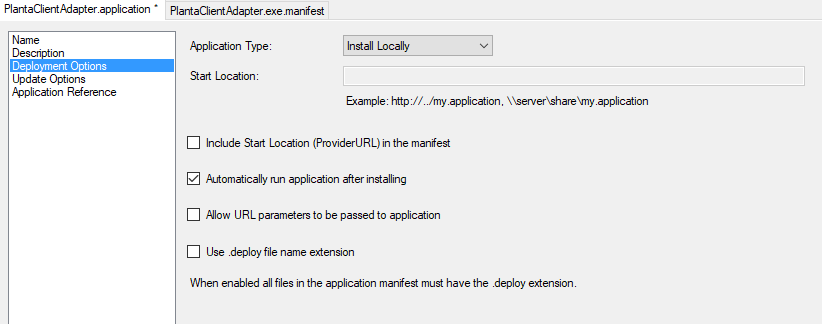
- Switch to the Deployment options tab.
- Here you should select Install locally so that the client does not have to be loaded anew each time it is opened.
- Deactivate the Include Start Location (Provider URL) in the manifest checkbox
- Activate the Use .deploy file name extension checkboxes if this has also been activated in the Application Manifest.
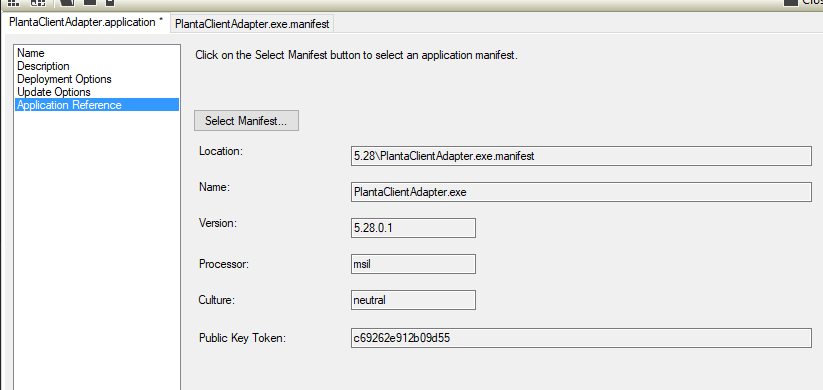
- Select the Application reference tab and open the dialog window by clicking on Select Manifest.
- Select the application manifest which has been created in the previous step and click on Open.
- Select File Save As and save the file as in the first step. It is important that this file be saved one level above the application manifest file in the directory structure.
- Enter the certificate and password In the dialog for signing once again.

