The documentation from version 39.5.17 of PLANTA project can be found in the new PLANTA Online Help .
.
TWiki> CurrentEN Web>UserDocumentation>UserWorkflowsTutorials>StructureScheduleTutorial>StructureScheduleTutorialFromDB13
Tutorial: Structure Tasks From DB 39.5.13
Objective
- This tutorial is intended to show first-time users how to structure tasks in PLANTA project.
- The screenshots used are merely examples of functions. The screenshot layout may deviate from the actual program layout.
- Log on with user R41.
- Create a new project.
- Open the Schedule module.
- The following message box is displayed: Is a schedule to be copied in?
- Answer the confirmation prompt with No.
- Open the context menu by right-clicking on the project line and select the Insert Task entry.
- Enter a name for the task in the Task name field.
- Save.
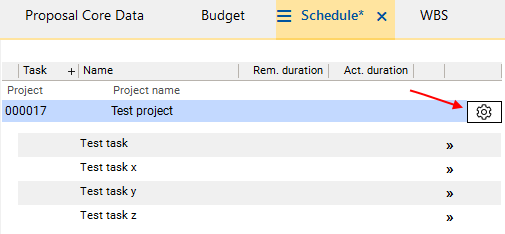
- Insert further tasks in the way shown in the image below.
- By default, the WBS code is displayed in the Task column. Click on the
 Generate WBS code button in the project line to generate the WBS code.
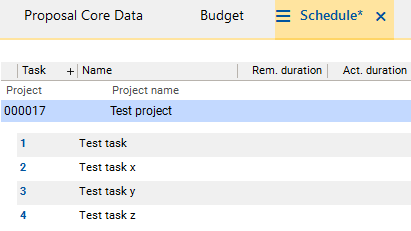
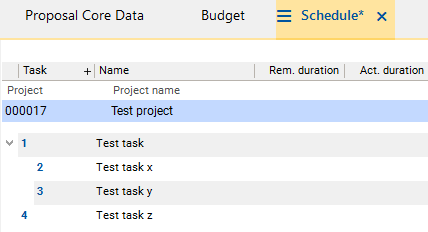
- Result: The WBS code is assigned to the tasks. Since the tasks have not been structured yet, this is only done by ascending numbering.
- Via the setting in the
show_psp_instead_of_IDparameter, the functional or technical task ID can be displayed in the Task column instead of the WBS code.
- Via the setting in the
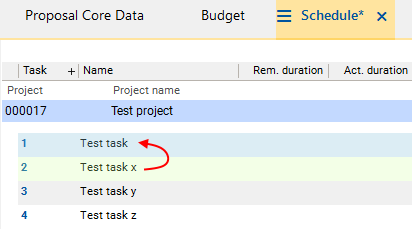
- Task x is to be subordinated to the Task.
- For this purpose, drag Task x on to Task by pressing SHIFT and holding down the left mouse button.
- As a result, Task x (source task) is visualized green and Task (target task) is visualized blue.
- Release the left mouse button as soon as the cursor is on Task x. Task x is moved below Task.
- Task y is to be subordinated to Task as well and positioned below Task x.
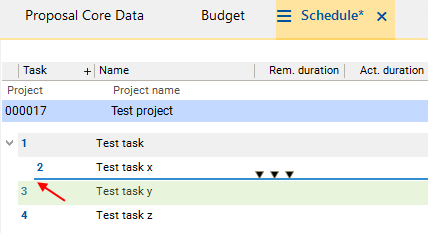
- For this purpose, drag Task y on to Task x by pressing SHIFT and holding down the left mouse button.
- A dark blue line is displayed. Pay attention to the line's position. It is to be positioned at the bottom of Task x and its starting point is to be equal to the starting point of Task x.
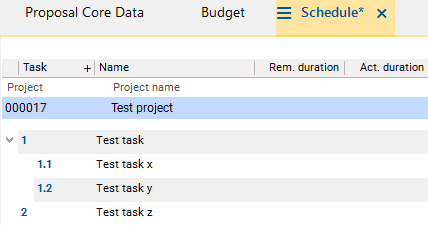
- Result:
- Task x was subordinated to the Task.
- Task y was subordinated to the Task as well and positioned below Task x.
- Update the WBS code. To do so, click on the
 Generate WBS code button in the project line. The code is appropriately set according to the predetermined structure.
- Save and click on the
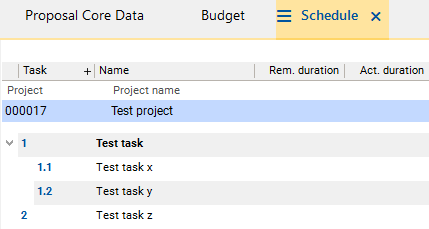
 Calculate schedule button in the toolbar. The parent Task is marked bold and therefore visualized as a summary task.
 - A summary task is a task in the structured schedule consisting of sub-tasks which are summarized here. Information on the summary task, such as duration and dates, is determined automatically from the sub-tasks.
- Switch to the WBS module in the Project panel by clicking on the tab of the same name.
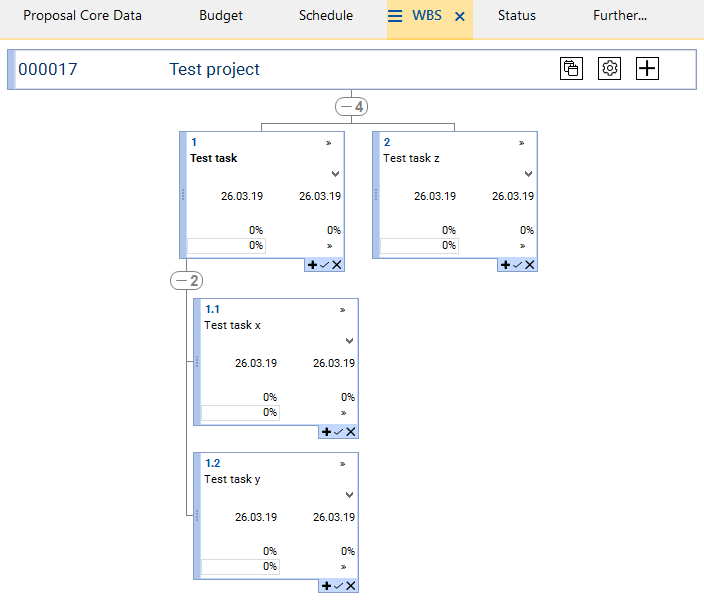
- Here, the structure created in the Schedule module is displayed graphically.
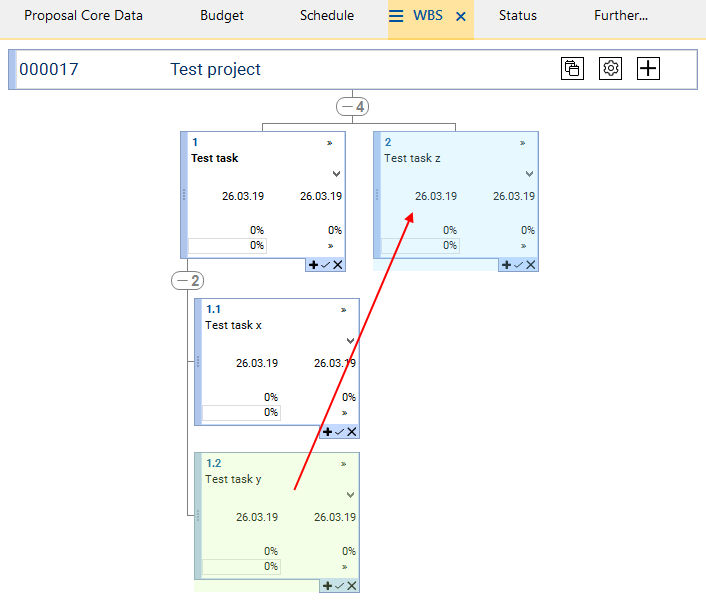
- The structure is to be changed: Task y is to be subordinated to Task z.
- For this purpose, position the cursor on the left margin of Task y: A hand symbol is displayed.
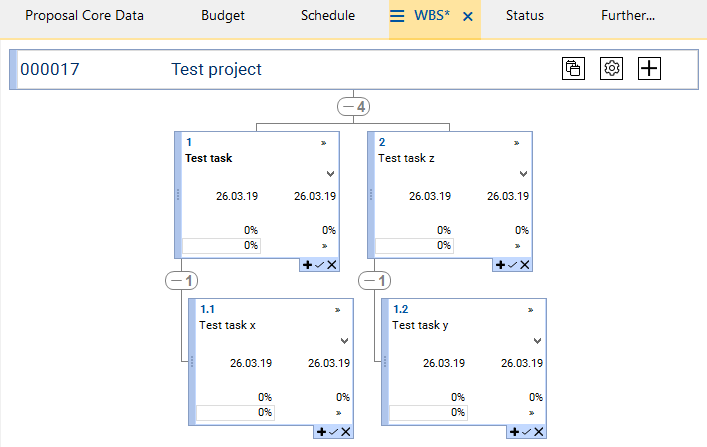
- Hold down the left mouse button and drag the box to the box of Task z. Release the left mouse button over this box.
- Result: Task y has been subordinate to Task z. However, the old WBS code is still displayed.
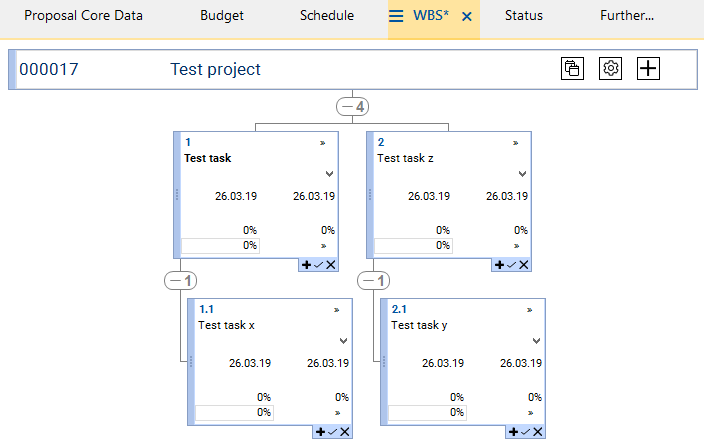
- In order to update the WBS code, click on the
 Create WBS Code button.
- Result: The code has been changed according to the structure.
- Switch to the Schedule module in the Project panel again. Click on the
 Update/reset and
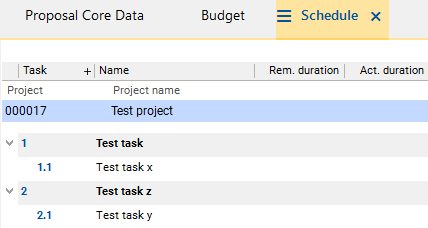
  Calculate schedule button in the toolbar. The new structure and the new WBS code are visible and the Task z is visualized as a summary task as well. Result:
| I | Attachment | History | Size | Date | Comment |
|---|---|---|---|---|---|
| |
PSP1.png | r1 | 3.9 K | 2019-07-10 - 11:12 | |
| |
PSP10EN.png | r1 | 19.7 K | 2019-08-19 - 11:33 | |
| |
PSP11EN.png | r1 | 13.0 K | 2019-08-19 - 11:33 | |
| |
PSP12EN.png | r1 | 13.0 K | 2019-08-19 - 11:33 | |
| |
PSP13EN.png | r1 | 4.6 K | 2019-08-19 - 11:33 | |
| |
PSP1EN.png | r1 | 6.6 K | 2019-08-19 - 11:31 | |
| |
PSP3EN.png | r1 | 4.5 K | 2019-08-19 - 11:31 | |
| |
PSP4EN.png | r1 | 6.1 K | 2019-08-19 - 11:32 | |
| |
PSP5EN.png | r1 | 6.0 K | 2019-08-19 - 11:32 | |
| |
PSP6EN.png | r1 | 4.6 K | 2019-08-19 - 11:32 | |
| |
PSP7EN.png | r1 | 4.6 K | 2019-08-19 - 11:32 | |
| |
PSP8EN.png | r1 | 4.7 K | 2019-08-19 - 11:32 | |
| |
PSP9EN.png | r1 | 15.1 K | 2019-08-19 - 11:33 | |
| |
SchaltflaechePSPCode.png | r1 | 0.5 K | 2019-08-19 - 11:53 | |
| |
calculate_schedule.png | r1 | 0.6 K | 2019-08-19 - 11:52 | |
| |
sync-alt.png | r1 | 0.6 K | 2019-08-19 - 11:52 |
