Tutorial: Operation of the PLANTA Software (Light) From DB 39.5.14
go to further tutorials
Objective of this tutorial
- To introduce first-time users to the elements of the PLANTA surface and to the operational functions.
Please note:
- This tutorial is especially designed for project team members. For users with management roles we recommend the extended version of the tutorial.
- All exercises are based on the PLANTA demo data. This demo data must be installed beforehand.
- The screenshots used are merely examples of functions. The screenshot layout may deviate from the program.
Starting and Exiting the Program
Start and log on
- Double click on the PLANTA symbol.
- The PLANTA logo now becomes visible and the network connection to the server is established.
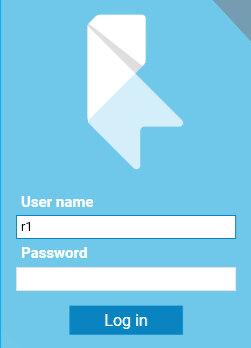
- Before the PLANTA logo, a form with two input fields for the user ID (user code) and the password appears.
- Enter the user code in the User name field, here R1 for the user with the employee/reporter role (PLANTA demo user).
- Demo users do not possess passwords, thus no input is necessary in the Password field.
- Confirm with Login.
Exit
- Use the Data Exit Program menu item or press ALT + F4.
- If there are any unsaved changes, the following message is displayed: Save? Some data has been changed. After the message has been confirmed, the program is closed.
- If all changes have already been saved, the program is closed (without further prompt).
- If no panel is open, you can also exit the program using the x button in the title bar.
PLANTA project Surface
Information
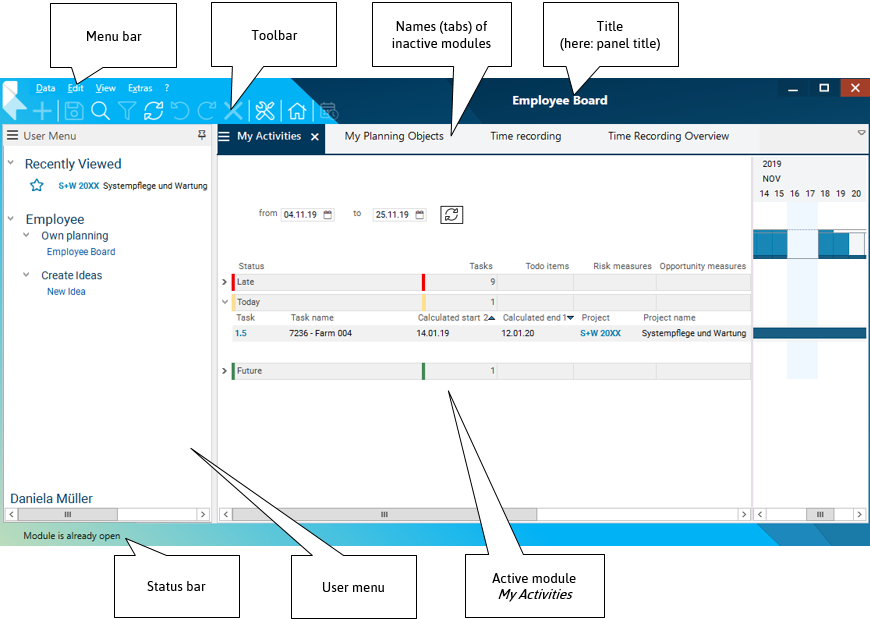
- Title bar
- forms the upper line of the screen and contains the following elements:
- PLANTA logo
- Menu bar
- includes menus with the individual menu items for execution of different actions and operations.
- Toolbar (standard)
- consists of buttons which represent the most frequently used menu items as graphical symbols.
- By clicking on a button in the toolbar, the respective action is carried out.
- the title
- of the active panel or
- the main module, if no panel title is defined, or
- the system title, in case no panel is opened.
- Status bar
- The status bar is placed at the bottom margin of the screen. Here, messages on the progress of the program which do not require confirmation are displayed.
- In between, there is the panel area which consists of user menu and user modules:
- Panel
- In PLANTA, a panel is a unit which is used to group modules. It contains a user menu, a main module, and possibly one or more submodules.
- Modules can be displayed as tabs or be frozen as windows at the top or bottom, or on the left or right hand side.
- Module
- In PLANTA, a module is a unit which enables the display and editing of data from the database (e.g. project data).
- User menu
- is a module which is displayed on the left hand side of the screen and contains the following elements:
- Links to the panels with editing modules and view modules. The links in the user menu are grouped by work area and role.
- The rights of the logged-on user determine which links are contained in the user menu.
- Links to the panels of recently viewed planning objects (projects, programs, ideas, proposals) and planning objects marked as favorites by the user.
- Name of the logged-on user.
Modules
Information
- A module enables data from the database to be displayed and edited.
- The data is arranged in records which again consist of individual data fields.
- A record summarizes attributes/parameters of an object (project, task, resource, etc.) with their corresponding values.
- Values are displayed in separate data fields.
- Which data fields belong to a record (record structure) is defined by the customizing of the corresponding data area.
- The same data field across several records forms a data logical column.
Example
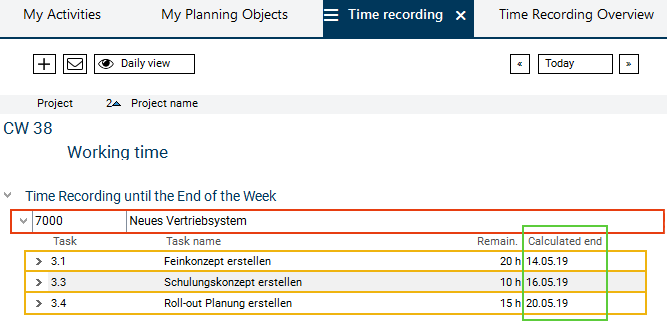
- Here, four records are displayed: a project record (marked red) and three task records (marked orange).
- The project record consists of two data fields (Project and Project name), and their corresponding values.
- The task records consist of four fields (Task, Task name, Remaining effort and Calculated end) and their corresponding values.
- All Calculated end fields form a column (marked green). The data logical Calculated end column equates to the layout column.
Graphical Representation of Data
Information
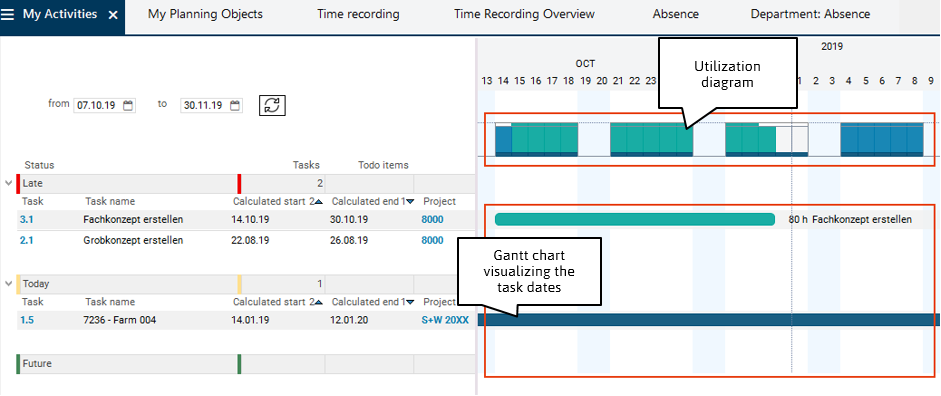
- In some modules, particular data is represented graphically:
- in the form of histograms, e.g. utilization diagram for the representation of resource utilization throughout a particular period,
- in the form of bars, e.g. visualization of project or task dates.
Buttons
Information
- Buttons in the PLANTA system are
- module buttons for executing different actions or for refreshing data or
- buttons in dialog or message boxes.
Example of module buttons

Note
- On each button there is a tooltip which gives explanations on the action on the respective button (in the case of pure symbol buttons) or further clarifies them (if the label is not quite meaningful). For this purpose, see the "tooltips” section.
Example of buttons in a dialog box
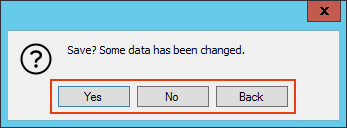
- To activate a button
- click on the button displayed on the monitor with the cursor or
- focus the button with the TAB key and subsequently press ENTER or SPACE (for module buttons) on your keyboard.
Context Menu
Information
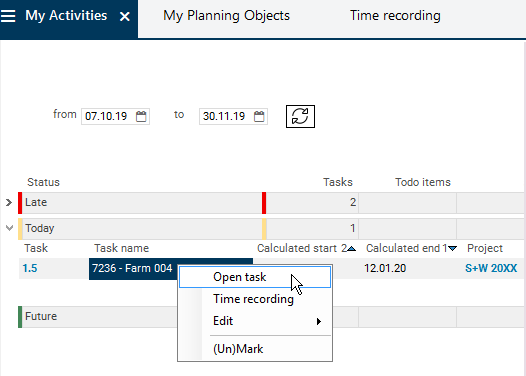
- You can open a context menu via the right mouse button.
- Depending on the record on which the context menu command was executed, different context menu commands are offered, e.g.:
- Insert: Insertion of records
- Display: Show/hide data
- Individual context menu commands: Start actions (e.g. open modules or macros)
- Edit: Standard editing functions for the activated data field
- (Un)mark: Mark or unmark the record
Tooltips
Information
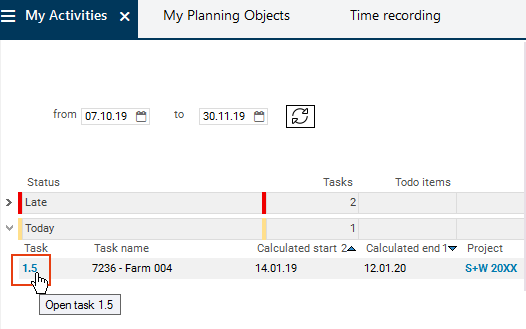
- Tooltips are texts which are shown when the mouse is moved over particular elements.
- In PLANTA project, there are 2 types of tooltips:
- Automatic tooltips are automatically displayed on the headings which are cut due to insufficient field length. In such a case, the tooltip displays the entire heading.
- Tooltips stored by the customizer. They contain help texts or explanations for the affected field. Such tooltips can be stored on regular fields as well as on fields and bars.
Create, Edit, Delete Data
Information
- PLANTA distinguishes between activation and marking of data.
- Data fields must be activated in order to record and edit data in them or to delete data from them.
- Records must be marked in order to be copied, moved, deleted, etc. entirely.
Activate/Mark/Unmark
Procedure
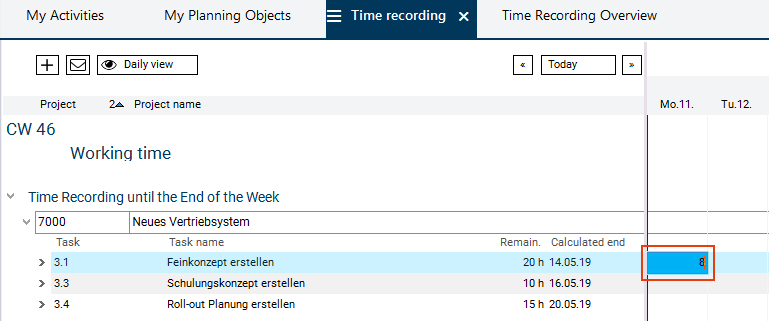
- Activate via click or via input.
- Only one data field can be activated (not the entire record). It is highlighted in bright blue.
- The record in which the activated field is located is considered focused. It is highlighted in light blue.
- Mark with CTRL + mouse-click.
- The entire record is marked.
- The marked record is highlighted in bright blue.
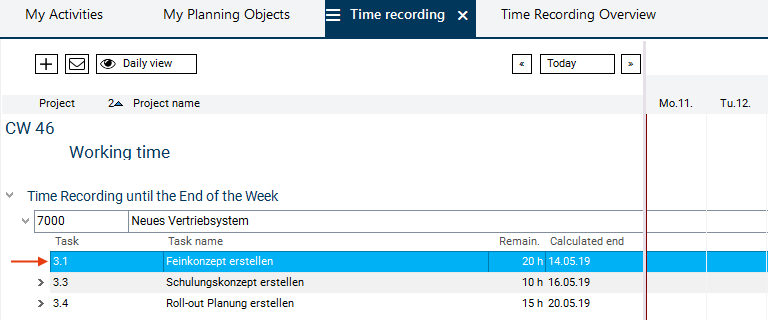
- Unmark with CTRL + click on the marked record.
- Mark several records:
- Select the first record and use CTRL + mouse click to mark it (here: task 3.1).
- Select a last record and use SHIFT + mouse click to mark it (here: task 3.4).
- This will cause all the records lying between the first and last record to be marked at the same time.
- Result:
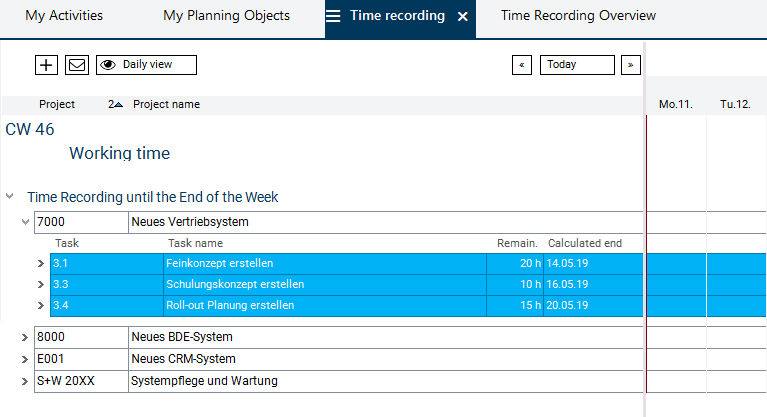
- The marked records can be unmarked via SHIFT + mouse click on the first record.
- Mark all records with CTRL + A.
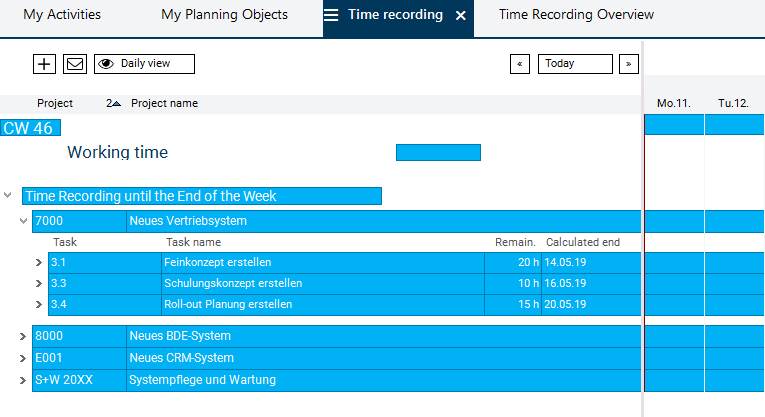
- The marked records can be unmarked with CTRL + D.
Edit
Edit existing values
- Which data fields can be edited and how they can be edited in existing records depends, among other things, on the data field type:
| Data field type |
Description |
Example |
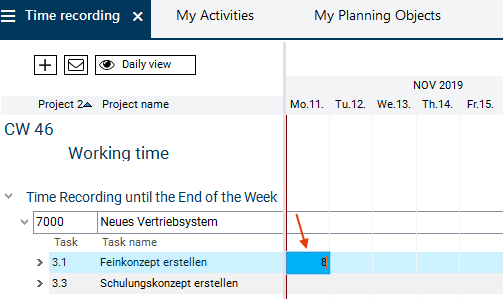
| Input data field (input) |
Here, input can be made and changed at any time.This field is bright blue when it is activated.E.g. input field for working hours. |
 |
| |
|
|
| Output data field (output) |
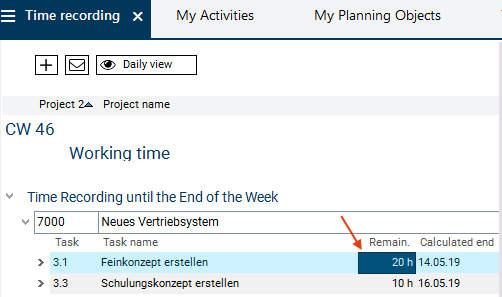
Here, no specifications can be made.Fields of this type are dark blue when they are activated.E.g. the display of the required remaining effort of a task in the Time Recording module. |
 |
| |
|
|
| Link data field |
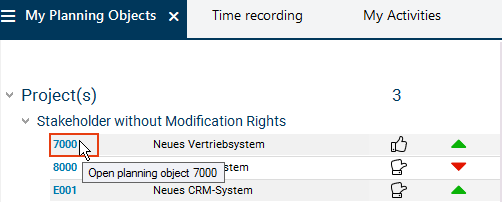
This is a data field the value of which is displayed as a hyperlink.If you click on a link, you are redirected, e.g. to another module. |
 |
| |
|
|
| Listbox |
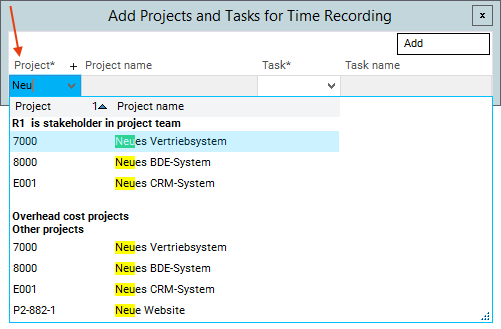
This is an input field to which a selection list with values is attached, so that you can either make a selection from the given list or make a manual input. |
 |
| |
|
|
| Mandatory data field |
This is a field which must be filled with values mandatorily. Without having filled this field, saving is not possible. |
 |
| |
|
|
| Checkbox |
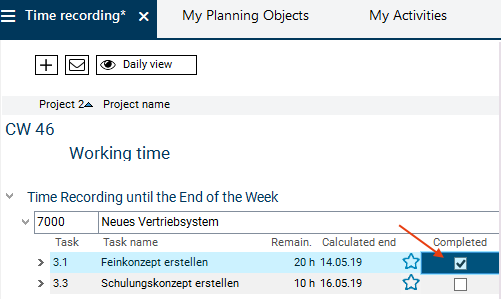
This is a field in which only Yes/No values are permitted in the form of a checked or unchecked checkmark. |
 |
| |
|
|
| Traffic light |
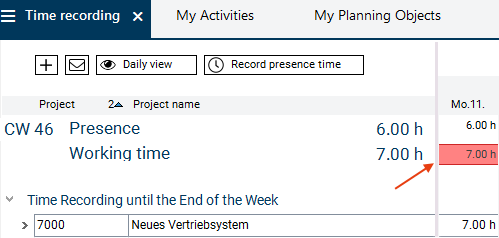
This is a field on which a traffic light function (color) is stored.E.g. as a warning notice when using the respective variant of the Time Recording module if the specified working time (here: 7 h) exceeds the presence time (here: 6 h). |
 |
| |
|
|
| Continuous text field |
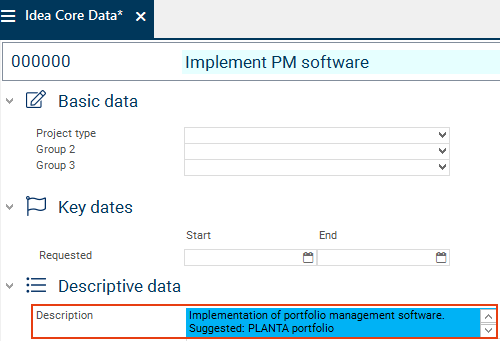
This is a field in which longer texts can be written. |
 |
DragDrop "> Copying of Data via Drag&Drop
Procedure
- New values can either be entered manually or be copied from other fields. For this purpose, you can used PLANTA's own Drag&Drop copy function, which replaces the conventional copying via CTRL + C and CTRL + V.
- Field to field (default setting):
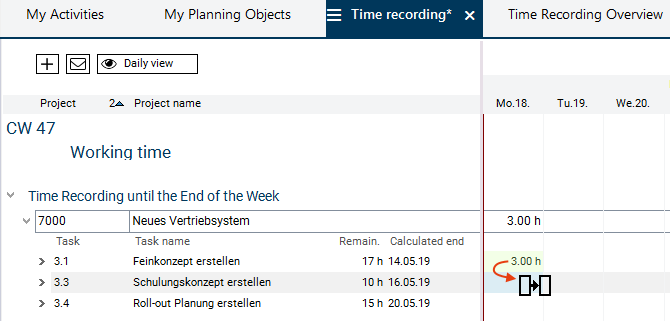
- Drag the content of the source data field (reporting field of task 3.1) to the target data field (reporting field of task 3.3) via CTRL + holding down the left mouse button.
- As soon as the cursor is on the target field, it changes its form (see the picture). Release the left mouse button.
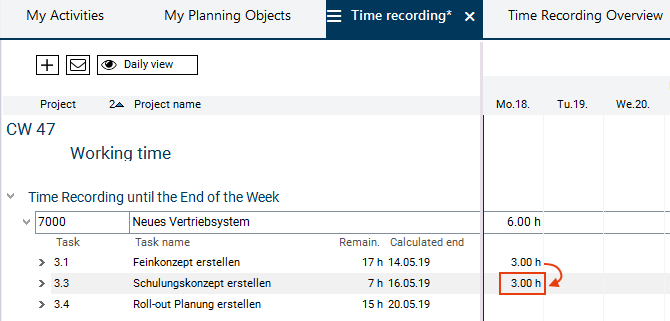
- The source field value is copied to the target field.
Insert New Records
Attention
- This option is only available in some modules, e.g. in a variant of the Time Recording module.
Procedure
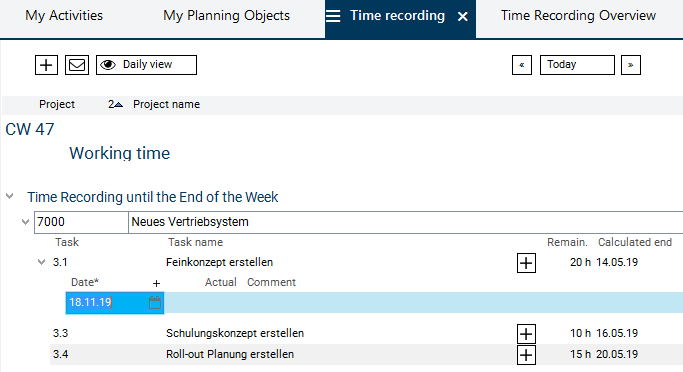
- Click on the plus symbol in the required record.
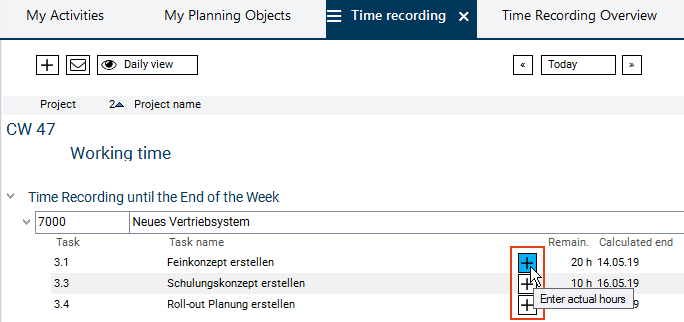
- Result: A blank record has been inserted.
Save
Procedure
- Save data
- by clicking on the
 Save button in the toolbar,
- by pressing CTRL + S or
- by using the Edit Save menu items.
- If some of the records are still invalid (blank lines) when you save, the following message appears: Mark invalid records?
- If this message is confirmed with Yes, the records with empty ID are marked. They can be edited, or they can be deleted via the
 Delete button.
- If the message is confirmed with No, the invalid records are not marked.
Delete
Deletion of values
- Activate the required data field.
- Delete the value.
- Save.
Deletion of records
- Mark the required record.
- Click on the
 Delete button in the toolbar.
- The following message appears: Delete marked data?
- Confirm it with Yes.
- Save.
Attention
- In PLANTA Standard the deletion of records in modules of the employee role is not permitted (identifiable by the grayed-out deletion symbol in the toolbar).
Documentation/Online Help
Information
- For the product documentation, PLANTA uses an online documentation tool based on the TWiki software.
- The webs (websites), which are divided into separate topics (websites), form the documentation structure.
- Webs: In each web, the respective main release is documented. The current main release of PLANTA project is listed under the name 39.5 Venus Current.
Example: Start page of the English version of the documentation of Release 39.5 Venus Current
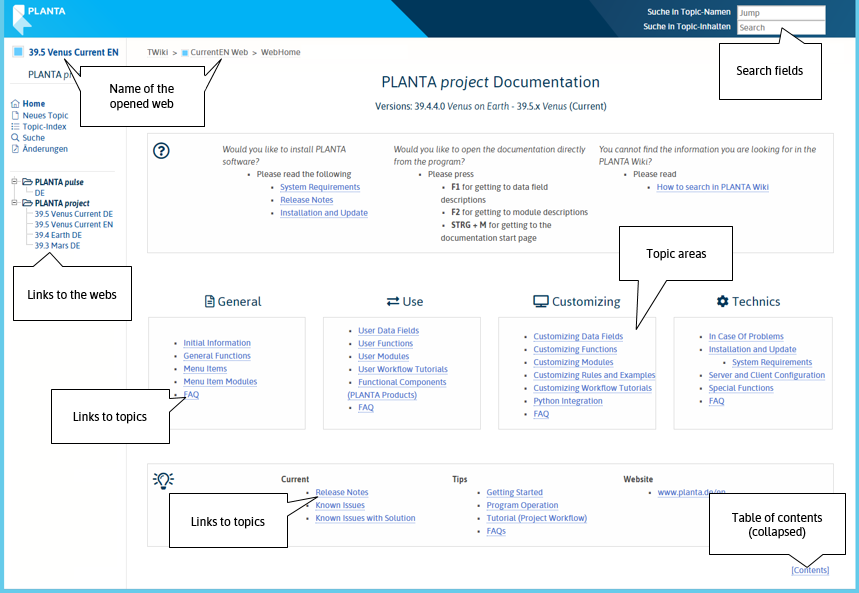
- Topics: The topics are constructed differently depending on topic and content.
- The following types of topics are distinguished:
- Module topics: They contain descriptions of individual modules (a topic contains the description of a module), e.g. BudgetMOD009BOW.
- Data field topics: They contain the descriptions of individual data fields (a topic contains the description of all data fields used in a data table), e.g. DT461Project.
- FAQ topics: They contain answers to frequently asked questions, e.g. UserFAQ.
- Function topics: They contain descriptions of individual, important functions, e.g. Create, Edit, Delete Links.
- Workflow topics (tutorials): They contain workflow- and process-related descriptions that again contain working processes, concrete examples and exercises. They can be used as basis for trainings or self-study, e.g. the ProjectWorkflowTutorialFromDB39514.
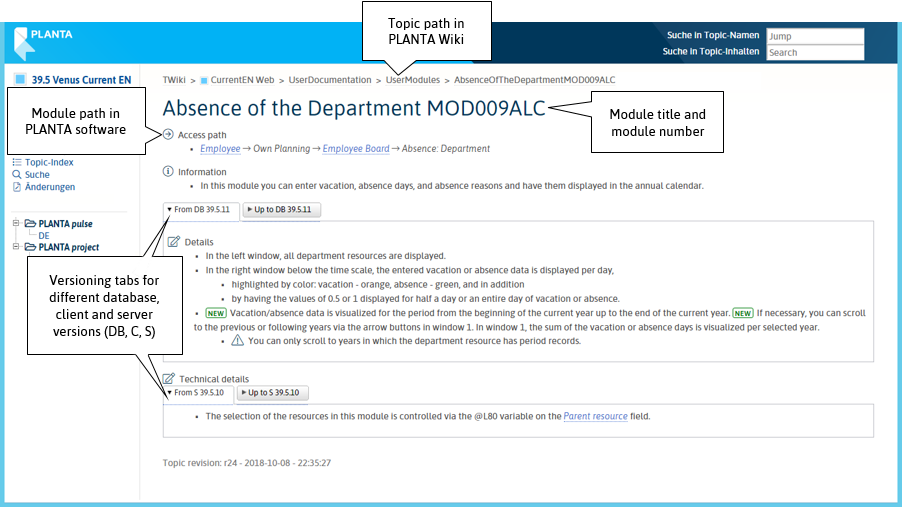
Example: Topic with a description of the
Absence of the Department MOD009ALC module
Read and write authorizations
- Each PLANTA project user has read-only access to the complete documentation.
- Currently, only PLANTA employees have modification rights.
Open Documentation
Procedure
- There are several ways to open the PLANTA documentation (PLANTA Wiki):
- If PLANTA project is already opened, you can do so by
- opening the required module and pressing F2 or selecting the ? Module description menu item. You are directly led to the description of the current module.
- activating the required data field and pressing F1 or selecting the ? Data field description menu item. The description of the current data field opens.
- or you can open the documentation independently from modules and data fields by pressing CTRL + M or by selecting the ? Open Wiki menu item. The start page of the documentation opens, from which you can navigate to the required themes via the search function of the table of contents.
- You can also access the PLANTA documentation without being logged on to PLANTA project: On the internet via http://wiki.planta.de
 .
.
Note
- If you press F1 or F2 on a field or in a module which is not contained in the standard program but which was customized individually in your system, only a notification page is opened in the PLANTA-Wiki, informing you that you are currently on an individual object.
Navigate
Procedure
- In the depth of the web structure you can navigate from the start page, e.g. via the table of contents or via the links on the start page.
- In the other direction, you can navigate via the topic path at the top of each topic.

- If you want to navigate between two objects on the same level, you first switch to the parent object and from there you can switch to the required object. For example:
Search
Procedure
- The search is done via the search fields on the right hand side of the website header. Alternatively you can find the required topic via the table of contents on the start page.

- Jump input field
- Search input field
- The string specified here is searched for in the topic content. The input Schedule, for instance, provides approx. 140 topics as search results.
- If the entered string is supposed to be a compound (word combination), please put them in quotation marks e.g. "copy project".
 .
.  CurrentEN Web>UserDocumentation>UserWorkflowsTutorials>ProgramOperationTutorialLight>ProgramOperationTutorialFromDB39514Light


 Save button in the toolbar,
 Delete button.
 Delete button in the toolbar.


 .
.


